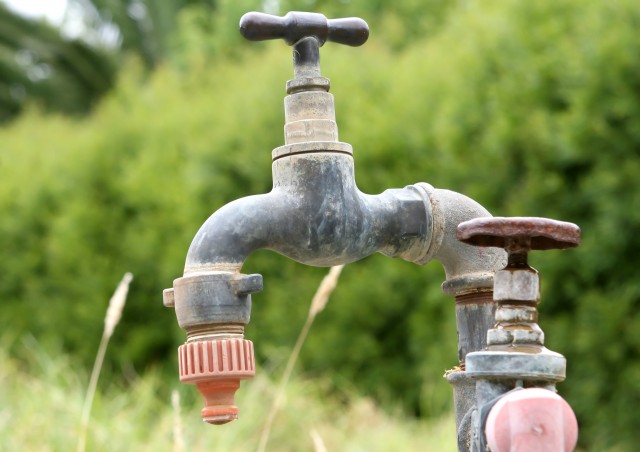
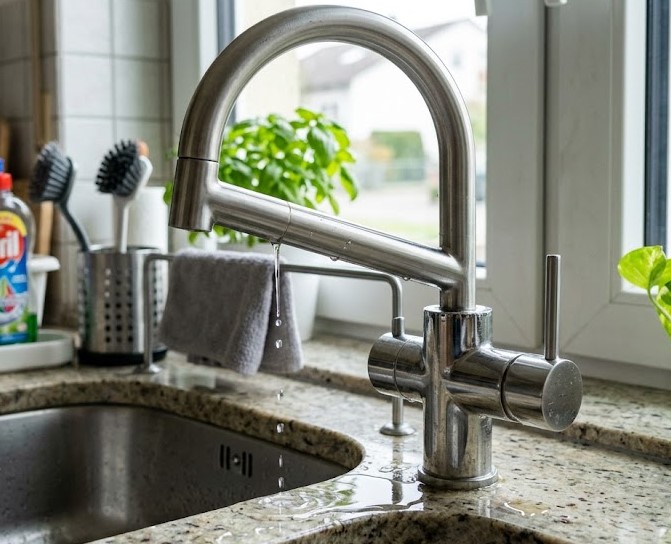
A dripping faucet isn’t usually seen as a “major problem.” It’s mostly just a few drops, a quiet tapping sound at night, and the thought, “I’ll deal with it later.” But when water drips for hours, water consumption increases, a film forms on the metal, and excess moisture gradually accumulates around the sink or washbasin. In a house, townhouse, or condo, such a “minor issue” quickly ceases to be “minor,” especially if you don’t catch it in time.
The good news is that you can figure out how to fix a leaky faucet without a plumber’s license or the nervous habit of jiggling the faucet handle every ten minutes. So let’s figure out why a faucet starts leaking, what kinds of problems are most common, and when it’s best to stop and call a professional.
Why is water dripping from your faucet?
The question of why my faucet is dripping almost always arises in the same way: yesterday everything was working quietly, and today the sink and faucet have turned into a “water metronome.” And for the most part, it’s not due to one major, obvious malfunction, but rather to minor and annoying wear and tear inside the mechanism. The faucet is opened and closed every day; parts rub against each other, deposits build up on surfaces, and rubber components gradually lose their seal. At some point, water finds a gap and begins to seep out even when the faucet is closed.
At the same time, the causes of a faucet dripping also depend on its design. In older two-handle models, washers, seals, and seating elements tend to wear out more often. In more modern single-handle faucets, the cartridge often becomes the weak point. There are also situations where the problem isn’t the shut-off mechanism itself, but mineral deposits, loose connections, or wear on the internal seating surfaces.
Therefore, the same symptom doesn’t always mean the same repair: in the kitchen and bathroom, the problem looks similar on the outside, but the underlying issue can be completely different.
Common Causes of Faucet Leaks
When a faucet starts to leak, the problem usually lies in one of several common components. It’s not always something rare or complicated; more often than not, the issue boils down to:
- Wear and tear on parts;
- Fatigue of internal mechanisms;
- Loose parts that held up for years but have finally given out.
This is precisely why the causes of faucet leaks often repeat from home to home: in the kitchen, in the bathroom, in a rental unit, in a family home, or in a small condo, the scenarios are very similar.
Sometimes water drips from the spout, sometimes it appears at the base of the body, and sometimes it pools under the sink, creating the false impression that the pipes are to blame. Therefore, before repairing, it’s important to understand exactly where the moisture is coming from and which component is failing.
Worn washers and seals
This is one of the most common scenarios, especially if the faucet has been in use for several years. Inside, there are small components responsible for ensuring a tight water seal. Over time, the rubber hardens, the edges wear down, and water finds its way out through the joints that are supposed to be watertight. From the outside, the problem seems trivial, but in reality, it’s often these small details that trigger the need to repair a leaky faucet.
And if you catch the problem in time, all you need to do is replace the faucet washer or update the seal. But there’s bad news: without taking it apart, this isn’t always visible. And even when disassembled, a worn-out part may still look “acceptable” but no longer be able to handle the pressure. That’s why even a few drops from the spout often indicate this type of wear.
The cartridge or valve is damaged
In single-handle faucets, the problem often lies not with the gasket but with the internal cartridge. It is the cartridge that regulates the water flow and temperature, and when its surfaces wear out or deposits build up inside, the faucet starts acting up: the handle becomes stiff, the water doesn’t shut off completely, and a thin stream or frequent drips remain coming from the spout. In such a situation, simply tightening the body is no longer enough, and replacing the faucet cartridge often becomes the most straightforward solution.
If you need a proper repair for a dripping faucet without the same problem recurring endlessly, the first thing to check is the cartridge. In older models, the valve assembly may also be failing, especially if the faucet has been worn out from prolonged use. From the outside, it looks the same, but inside the cause is different, so it’s important not to guess but to disassemble and inspect the assembly.
Loose or Corroded Parts
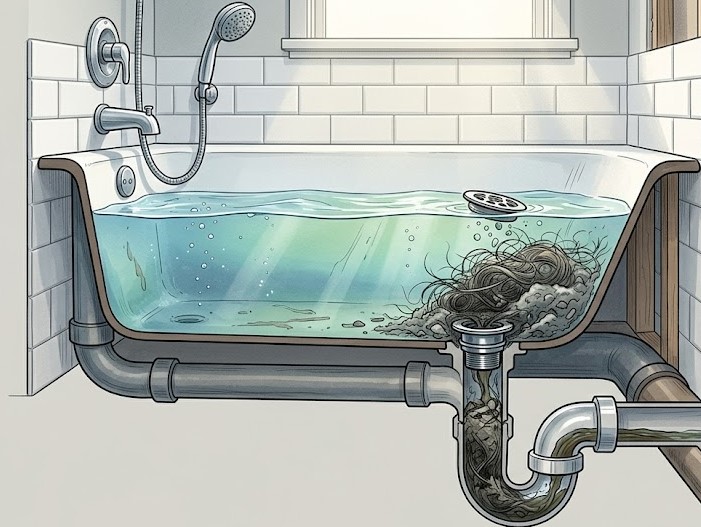
Sometimes the problem isn’t with the washer or the cartridge. The faucet may start leaking due to loose nuts, worn-out connections, rust on the threads, or buildup that has accumulated inside the body over the years. In such a situation, the faucet leaks water not only through the spout but also at the base, under the handle, or even where it attaches to the sink.
At first, it looks like random drips, then constant dampness appears, and eventually the sealant, metal, and surrounding surface start to deteriorate. And it is precisely these cases that often lead the owner not to simply replace a single part, but to undertake a more thorough repair of the faucet. Sometimes it is enough to tighten the fasteners and replace the seal. Sometimes corrosion has already eaten away at the mounting surface, and a local repair provides only a brief respite. Here, it’s important not to try to “fix” everything with a single gasket: if the assembly has become loose or the metal has started to deteriorate, the source of the leak is usually deeper.
How to Fix a Leaking or Dripping Faucet in 4 Simple Steps
Once you have a general idea of the cause, the repair no longer feels like a gamble. In most household situations, there’s no need for a complicated teardown of the entire system: just follow the steps in order without skipping any stages of the faucet repair. That’s exactly how fixing a leaky faucet works: first, eliminate the risk; then, find the weak spot; replace the worn-out part; and only then check whether you’ve successfully fixed the dripping faucet without any hidden leaks or it starting to drip again an hour later.
Step 1 – Turn off the water supply
The first thing you need to do before any inspection is to completely shut off the water supply to the faucet. Without this, even the simplest DIY faucet repair quickly turns into a wet mess with towels, puddles in the cabinet, and unnecessary stress. Plus, it’s harder to properly inspect an open, pressurized faucet: the water makes it difficult to figure out exactly where the problem was and which part actually needs replacing.
Step 2 – Inspect the faucet components
Once the water is turned off, don’t rush to replace anything right away. First, you need to figure out exactly which part has failed. This is where the step that can be called a simple faucet repair guide comes in: remove the decorative elements, access the interior, and calmly inspect the condition of the washers, seals, cartridge, fasteners, and mounting points. Sometimes the cause is immediately obvious: the rubber gasket has cracked, there’s a buildup on the parts, a connection has loosened, or there’s already visible wear inside.
At the same time, it’s worth checking for any traces of old leaks at the base of the body, under the handle, and in the mounting area. This helps determine whether the problem stems solely from the water shut-off mechanism or if the leak has already spread to adjacent connections.
And this is exactly where standard faucet maintenance tips come into play: don’t ignore white deposits, don’t overtighten parts, and periodically check for moisture where it shouldn’t be. Such an inspection often saves both money and the need for another repair a week later.
Step 3 – Replacing Defective Parts
Once it’s clear exactly what has worn out, the next step is to carefully replace the specific component.
- If the problem is with a rubber part, replace the washer or gasket;
- If a single-lever faucet is malfunctioning, they usually check the cartridge.
At this stage, it’s best not to try to revive a worn-out part “for another season.” Worn rubber, a cracked seal, or a broken cartridge cannot be repaired or restored; they are usually simply replaced. And yes, before installing a new part, it’s a good idea to clean the mounting surface of any buildup and debris. Otherwise, the new part won’t fit properly, and the problem will recur (or even get worse).
Step 4 – Assembly and Testing
After replacing the part, reassemble the faucet in reverse order. The key here is not to rush and not to over-tighten everything “until it clicks.” Turn the water back on gradually and observe how the assembly behaves under pressure. It’s important to check not only the spout itself, but also the base of the faucet, the area under the handle, and the connections under the sink. If everything is dry, the water pressure is steady, and no water seeps out after turning it off, then you’ve successfully stopped the faucet from dripping without any hidden defects inside.
But sometimes, after reassembly, the faucet behaves normally for the first five minutes, after which the problem returns, undoing all your progress. Therefore, it’s best to test thoroughly and with expertise: turn on the water, adjust the temperature, fully close and reopen the faucet several times, and then let the system sit.
This final “test run” immediately shows whether the problem has truly been resolved or if there is a thread that wasn’t tightened enough, a warped gasket, or a part that didn’t seat all the way.
When DIY Repairs Are No Longer Enough
Not every problem is worth trying to fix on your own. It’s one thing to repair a leaky kitchen faucet caused by a washer or cartridge. It’s quite another if water is seeping under the sink, the cabinet is getting damp, a musty odor appears, or the leak returns shortly after replacing a part. It’s the same story with the bathroom: an attempt to fix a leaky bathroom faucet may not be due to the faucet itself, but to hidden wear on the body, old connections, or a deeper problem in the plumbing. From the outside, it looks like a minor malfunction. Inside, it may already be a major issue.
There are several signs that indicate it’s best not to continue your DIY experiment:
- If the faucet is old;
- Parts crumble during disassembly;
- The fasteners are rusted;
- The mounting surfaces are damaged;
- The leak keeps recurring.
In such cases, it’s time to move from DIY efforts to professional diagnostics. And here, the question of when to call a plumber to repair the faucet is no longer theoretical. A professional is also needed when the leak is accompanied by unstable water pressure, noise in the unit, signs of corrosion, or a leak not only at the faucet itself but also further down, in the connections. And with this kind of plumbing repair, it’s best not to delay: the longer the water flows where it shouldn’t, the more expensive it becomes—not just the faucet, but everything around it.