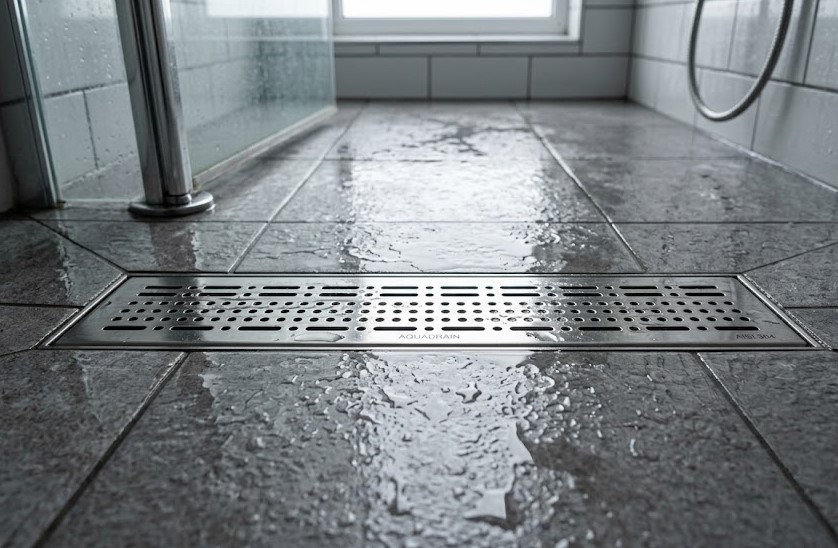
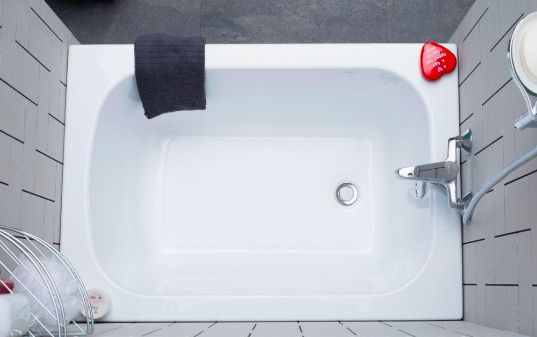
So what if the water drains slower than usual after a shower? So what if there’s a film of soap left at the bottom, and it looks like a little nest of hair, grime, and old dirt has settled under the grate? It’ll clear up on its own.
But when it doesn’t, you realize: the drain needs cleaning. But before you can get to it, an unexpected challenge awaits—the plug. It seems simple enough, right? But no, many people forget about cleaning the drain right at the stage of removing this small part. And they let the situation get out of hand.
That’s why figuring out how to remove a bathtub drain stopper is useful not only when there’s an obvious problem, but also for routine maintenance. Some mechanisms come off almost effortlessly, while others are more secure and don’t like sudden movements. It’s also helpful to understand when it’s actually necessary to access the drain, what types of plugs exist, what you can safely do on your own, and when it’s better not to try to be a DIY plumber but to call professionals right away.
Why You Might Need to Remove the Bathtub Drain Plug
Usually, no one even thinks about the drain until it starts delivering unpleasant “surprises.” The water takes longer than usual to drain, a musty smell appears in the sink or bathtub, and a thick clump of hair, soap, and grime accumulates under the plug. In such a situation, you have to remove the bathtub drain plug not out of curiosity, but because without doing so, proper cleaning simply won’t work.
And that’s when you start to realize that some plugs are formidable foes. Especially when the mechanism starts to jam: sometimes it won’t close all the way, and other times, it refuses to pop up. Sometimes, after a botched installation, it sits crooked, catches on the tub’s rim, or prevents the water from draining as it used to. Since maintaining the bathtub drain is impossible without removing the plug, it’s best to know how to do it.
Prevention is a whole other story. If you periodically disassemble the drain and clean the accessible parts of the mechanism, you can significantly extend its normal operation. This is especially useful in homes where the bathtub is used frequently: scale, product residue, and small debris accumulate there quickly, and the consequences of ignoring this problem are quite clear.
Types of Bathtub Drain Plugs
Before unscrewing or pulling anything, it’s important to understand exactly what kind of mechanism is in your bathtub. On the outside, many plugs look similar, but inside they have different logic and mechanics that trigger that very “plumbing comedy”: a person acts at random and then wonders why the part won’t come off, or why it broke altogether.
“Push-and-pull” type stopper
 This type usually looks simple: there’s a small handle or cap on top that you can grip with your fingers. The mechanism works without any tricks, and removing the drain stopper using the “push-and-pull” method is often the easiest to understand. Usually, the top part is held in place by a screw or a threaded connection, so first secure the plug, then carefully unscrew the top element.
The key here is not to rush. If the part hasn’t been removed in a long time, grime and moisture may have slightly “glued” it in place. In such a situation, removing the plug from the bathtub drain must be done carefully: without using pliers too forcefully and without trying to rip the mechanism off with a sudden jerk.
Stopper with a lift-and-turn mechanism
This type opens and closes by turning the top part. From the outside, it looks compact, but inside it is usually held in place by a fastener that must first be loosened. For this reason, removing the stopper from the sink using a lift-and-turn mechanism (as well as from bathtubs) begins with a careful inspection of the top: sometimes only the cover comes off, and sometimes the entire central part comes off with it.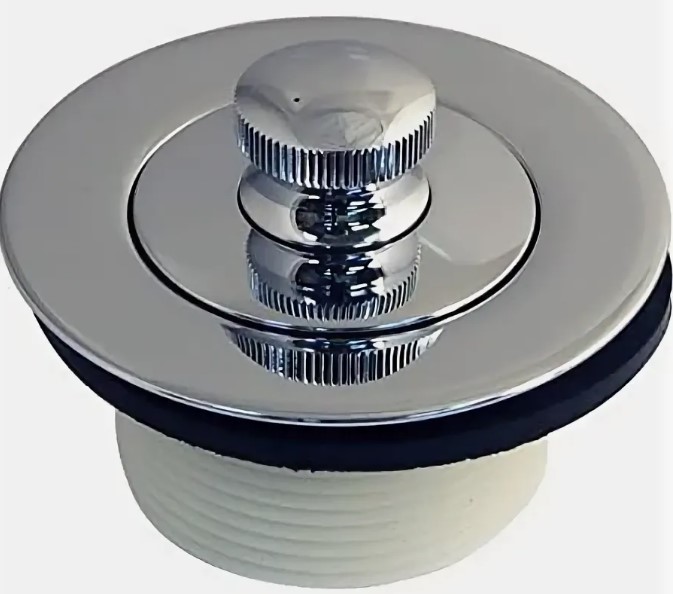
If you proceed blindly, it’s easy to assume the stopper is “stuck,” though in reality it simply needs to be turned into the correct position. When removing the stopper from a bathtub, it’s especially important not to press down too hard, so as not to distort the mechanism.
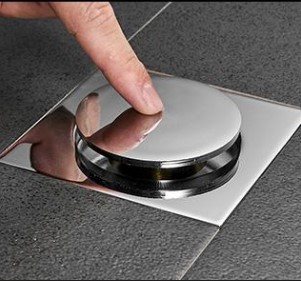
Toe-operated stopper
This is the type that activates with a light press. Press once—the drain is closed; press again—it’s open. Inside, there’s usually a spring assembly, and it’s this mechanism that makes the design convenient for everyday use but slightly more finicky when disassembling.
Therefore, removing the drain plug, which requires a toe touch, calls for care: first, check if the stopper is in the open position, and only then try to unscrew it or remove the top part.
If the spring is dirty or worn out, removing the drain plug in the bathtub may be more difficult than usual. But a “brute-force approach” isn’t needed here. What’s needed is patience, a dry cloth for grip, and an understanding that there’s a rather delicate mechanism inside that can easily be damaged by rough handling.
Sliding Stopper
This is a more complex system where the stopper is connected to a lever or rod. From the outside, it all looks convenient: you lift or lower the handle, and the drain opens or closes. But inside, there is not just a single part, but a whole set of components. This is precisely why removing a sliding bathtub stopper often turns out to be the most troublesome.
Here, the bathtub drain plug itself may be connected to a lever mechanism behind the wall or under the tub. And while in simple models everything can be handled manually, here it’s best not to tinker unnecessarily without understanding the design. Otherwise, you might not only remove the plug but also create additional “adventures” for yourself.
How to Remove a Bathtub Drain Plug
It’s best not to approach this with a “let’s just fiddle with it and see what happens” mindset, but rather with a “first understand how it works, then get to work” approach. Different drain plugs have different mounting mechanisms, and there’s no one-size-fits-all method.
But the general logic is the same: first, identify the type of stopper, then release the upper part, and after that, carefully remove the mechanism and clean the accessible area of the drain.
Key steps before starting work
Before disassembling the drain, you should drain the water from the tub and wipe the stopper itself dry. This makes it easier to hold the part, and small components won’t slip out of your hands.
If you’re unsure exactly what kind of mechanism is inside, first simply examine the top part carefully: is there a rotating handle, a threaded connection, a button, a movable cover, or a lever mechanism? This is where you begin to understand how to remove the bathtub drain plug without causing unnecessary damage.
Almost always, the water supply doesn’t directly interfere with the work. But if you’re disassembling other plumbing fixtures nearby (such as a faucet) or there’s a risk of accidentally turning it on, it’s wise to temporarily shut off the water.
This isn’t a mandatory step for every situation, but rather a standard precaution. Once everything is prepared calmly and without rushing, you can easily remove the bathtub drain plug.
Removing Common Types of Plugs
 For “push-pull” models, first remove the top handle or cover, and then release the stopper itself. If the plug is a lift-and-turn type, you often need to move it to the open position and only then carefully rotate the top part, taking care not to tear it off in one motion. In models with a toe-push mechanism, the top cover often unscrews after the mechanism is locked in the desired position.
If there is a pull-out stopper, things get more complicated: the connection to the lever or rod may require access not only from above, and here it is important not to guess by touch.
Overall, however, if you know how to remove the plug from the bathtub drain, this “quest” ends in success. Especially when the part comes out easily—that means you’ve figured out the logic. If it resists, wobbles, or starts turning strangely, it’s better to stop and check the type of fastening again. Carefully removing the drain plug is always better than trying to outwit the plumbing fixture. As experience shows, it often has a worse temper than you do.
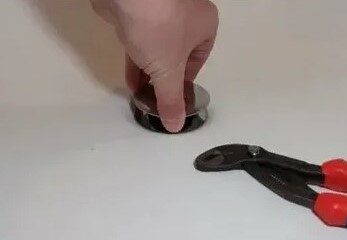
What should you do if the drain plug is stuck?
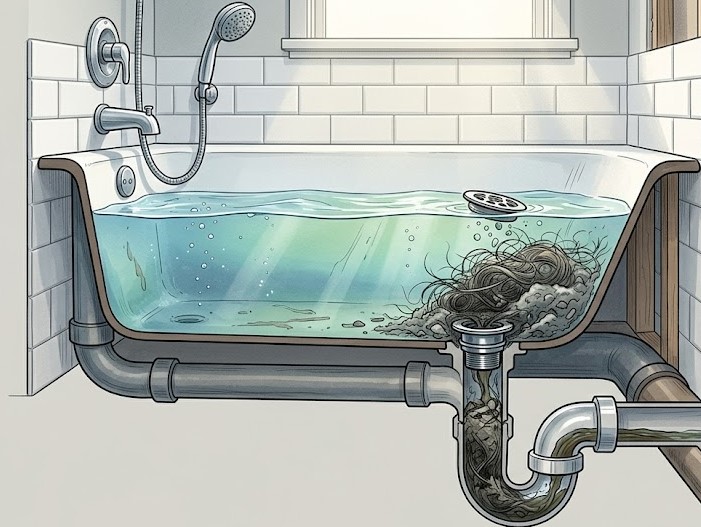
When the plug won’t budge, your first instinct is usually very simple: grab it firmly and yank as hard as you can. But this is where you should hold back: if the plug is stuck tight, the problem is most often not that you weren’t determined enough, but rather due to buildup, misalignment, rust, or debris accumulated inside the mechanism.
Using brute force here usually ends up with stripped threads, scratches on the finish, or damage to internal parts that could have otherwise been easily salvaged.
Reasons why the stopper gets stuck
The most common reason why a stuck plug in the bathtub drain won’t come out is a typical mixture of hair, soap, limescale, and wet dirt. It accumulates around the body, clogs the joints, and gradually turns a moving part into a stubborn one. If the mechanism is old, this is compounded by corrosion of the metal parts or deformation of small components, especially if the stopper has been removed before and then not reinstalled quite straight.
There’s another scenario: the stopper itself won’t come out of the bathtub drain not because it’s broken, but because people are trying to remove it the wrong way. For one mechanism, you need to unscrew the top; for another, first set it to the open position; for a third, check whether the internal rod is holding it in place. In other words, the problem may not be the jamming itself, but a mistake made at the start.
Safe ways to loosen it
If the stopper is stuck tight, first clean the visible part of any buildup and debris. Sometimes this alone is enough to get the mechanism moving more freely. Then you can gently try wiggling it in different directions without jerking it, to figure out exactly where it’s catching. When someone is looking for a way to remove a stuck drain plug in the bathtub, the safe approach almost always starts with gently loosening the part, rather than trying to force it out in one go.
It’s also helpful to give the mechanism a little time after cleaning and to avoid working on a wet surface. A firm grip with your hands or through a dry cloth is often more effective than an aggressive tool.
If the task is to clean the bathtub drain plug while removing it without damage, the logic is simple: first remove whatever is obstructing movement, then check the type of fastening, and only then continue disassembly. If the stopper won’t budge at all or starts to wobble strangely, it’s best to stop before a small problem turns into a full-scale repair.
When should you replace or clean the drain stopper?
Not every drain problem means the mechanism needs to be thrown out. Sometimes the stopper is simply “stuck” with mineral deposits, clogged with hair, or has become difficult to move due to dirt around the mounting. In such a situation, it’s enough to remove the accessible parts, rinse them, remove the debris, and put everything back in place.
If, after cleaning, the stopper moves smoothly again, closes the drain tightly, and doesn’t get stuck, a complete replacement is usually not necessary. In many cases, regular maintenance of the bathtub drain resolves the issue before it escalates into a breakdown.
However, it’s worth replacing the mechanism when the problem is no longer just dirt. For example, if the stopper is warped, doesn’t lock into the correct position, leaks water even when closed, shows signs of corrosion, or has damaged threads.
The same applies to situations where the part has already been removed, cleaned, and reinstalled, yet it continues to malfunction. In such cases, replacing the bathtub drain plug is usually a wiser choice than endlessly trying to revive a mechanism that is clearly signaling it has reached the end of its useful life.
When to Call a Professional Plumber
Not every drain is worth taking apart until you succeed. If the stopper won’t budge, the mechanism goes deeper than expected, or the area under the tub is starting to look like a “you’d better know what you’re doing” zone, DIY disassembly quickly ceases to be a good idea.
In such cases, having a professional plumber remove the drain stopper is usually cheaper and less stressful than dealing with the consequences of a failed DIY attempt to reach it.
It’s also worth calling a professional when the problem is clearly not with the drain cover itself. For example, if the bathroom drain plug works normally, but the water still drains slowly, there’s a foul odor, you hear gurgling sounds, or the clog keeps coming back. This doesn’t look like just some local debris near the stopper—it’s likely a deeper issue within the system.
How Pryde Group Can Help
When the drain starts acting up, it’s important not just to remove the visible part, but to understand what’s happening inside. And Pryde Group plumbers start by inspecting the drainage system: they check exactly where debris is accumulating, what condition the mechanism is in, and whether the root cause is hidden further down the line. Sometimes the problem really is limited to the stopper. Sometimes it’s just the first thing that catches the eye.
Next, the protective plug is carefully removed if necessary to access the drain and clean it. After that, the technicians perform a professional cleaning and, if necessary, repair any parts that are worn out, jammed, or preventing proper water drainage. If the problem is recurring, Pryde Group offers not a temporary fix, but long-term plumbing solutions so that the bathtub functions as a bathtub again, rather than a slow-draining decorative pond.